The
![]()
Guide to:
The Basics of Scenery Building
"The layout is a stage, and the trains are the actors."
That phrase was said long ago by Frank Ellison, one of the pioneers in the model railroading hobby. His Delta Lines layout set new standards in operating realism. Ellison’s quote referred primarily to operating the trains realistically, but it also applied to the layout itself. Scenery provides a backdrop for the trains and enhances the feeling that they are moving through their own miniature world. For many model railroaders, scenery construction is the most enjoyable aspect of the hobby.
Many novices are afraid to try scenery, but in reality the basic techniques are not that difficult. Numerous off-the-shelf scenery products are available, alleviating the do-it-yourself method that did make scenery a challenge 40 years ago.
In this article we will show how we built the scenery on the Trainz.com display layout. Nearly all of the scenery on the layout is comprised of products we sell on the Trainz website.
With a little time and practice, a flat tabletop can be turned into a realistic, visually appealing little world.
Part 1. Basic Scenery Rules
Generally, the easiest way to research scenery is to go outside, look around, and take notes. Or better yet, take a vacation to the area you want to model. Pay particular attention to how the laws of nature work, such as the way vegetation collects in areas with lots of water, how drainage and erosion effects the shape of the ground, and how manmade objects interact with the natural world around them.
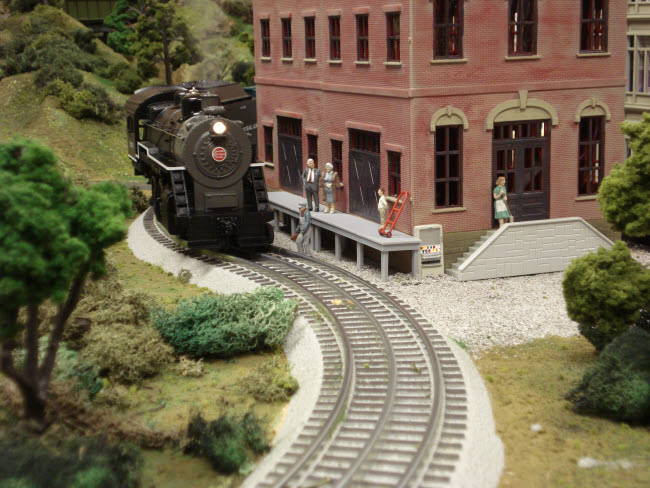
The last part of the paragraph above touches on the most important rule
when building model railroad scenery: Make it look like the
scenery was there first. For example, look at the pictures
below:
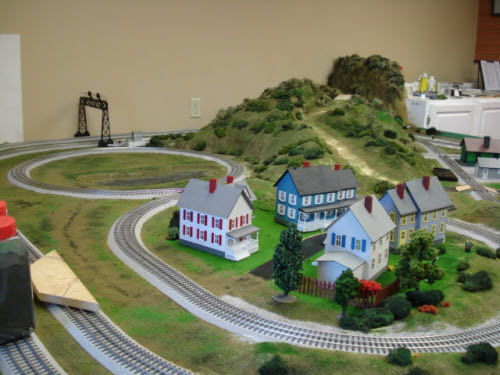
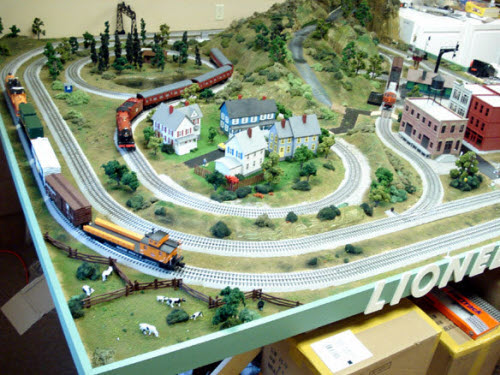
Notice that the 'hills' are actually shaped to look like one large hill, with a cuts blasted out for the tracks to pass through. The slope of the hill is constant, going from high to low as it moves towards the center of the layout.
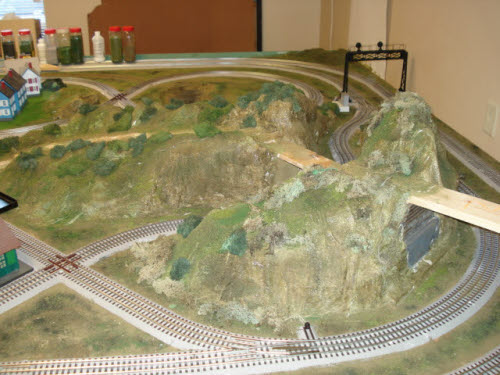
Part 2. The Hills
The large hills on the Trainz layout are made from plywood, newspaper, masking tape, and covered with Woodland Scenics Plaster Cloth [available here on our website].
First, a form for the ridge of the hill is cut from ½" plywood using a jigsaw. The plywood frame serves at the spine of the hill. It is held in place by using wood scraps as cleats to hold the frame upright. The scraps are screwed into the table top with a gap between them of ½", and then the plywood form is slid in between and glued into place.
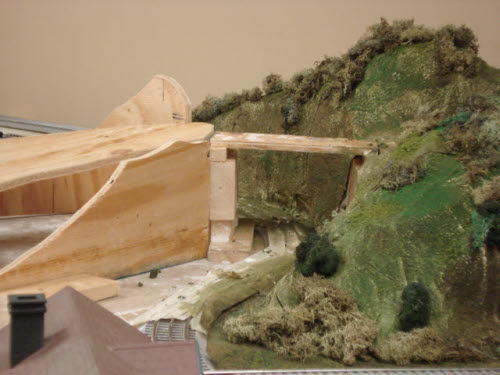

The base for the roadway going the up the hill was also put in place at the same time.
Once the plywood form is in place, wadded up newspaper and masking tape is used to make the hillsides. The hillsides slope gradually from the top down to the tabletop.

Remember to always take into account the clearances needed for your cars and engines. Keep your locomotive or car with the largest overhang on hand at all times to make sure that you will have adequate room for your trains to navigate.
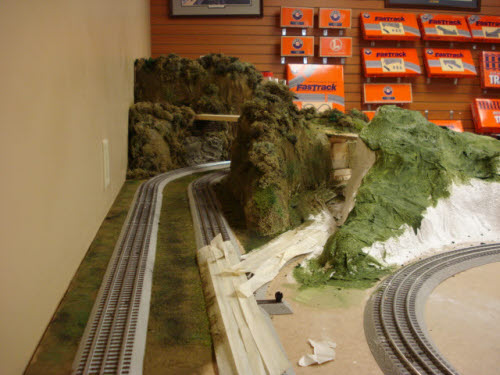
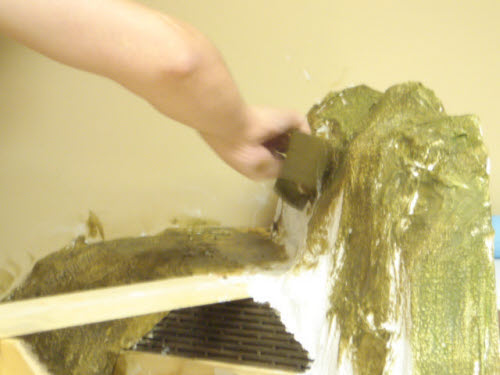
Next, the plaster cloth is dampened and draped over the newspaper and tape. Woodland Scenics Plaster Cloth is essentially the same stuff used to make arm and leg casts, and when dried it provides a study but relatively light base for your scenery.
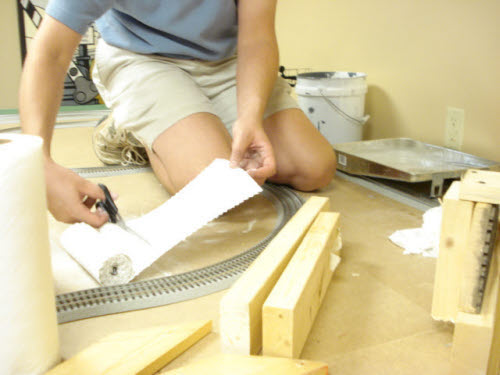
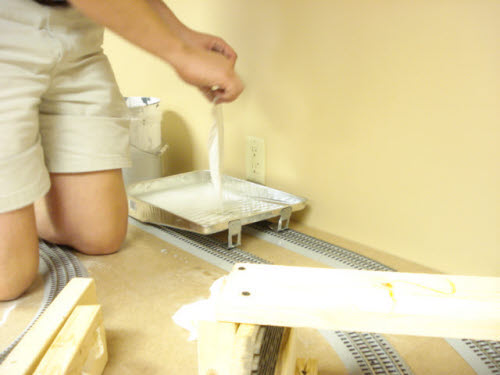
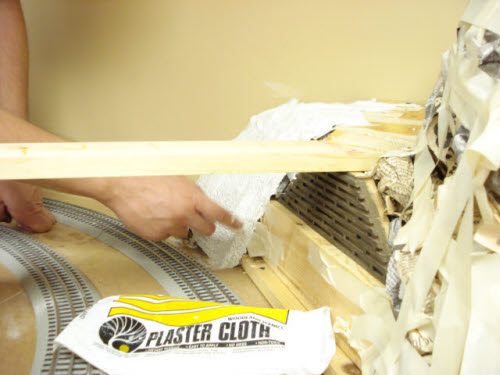
We cut the cloth into 12" strips, dipped it into a paint tray full of water, and draped the cloth over the newspaper and tape base. The cloth begins to set in about 20 minutes and takes 24 hours to fully cure. You will know it is ready for the next step when it is room temperature. If it is cool, it is still damp and is not ready. Make sure the cloth connects to any flat surfaces like roadways or the table top to provide a smooth transition and prevent any gaps between the hill and table surface.
Expect to make a mess when using the cloth. Lots of powder will fall off the cloth while using it and will get on the table, your clothes, your hands, and just about anything else it can come into contact with. Be sure to cover your track with tape when using plaster cloth. If not, you will have to go back and clean all of your track, like we did after building this scenery!

A
roll of cloth will cover about 10
square feet. We used about 12 rolls on the Trainz layout, and the cloth
covers about ½ of the layout surface.
Part 3: Painting the Scenery
When the cloth is dry, we move on to painting it. We used Woodland Scenics Green Undercoat (C1228) and Earth Undercoat (C1229), alternating applications of both until the proper shade was attained.

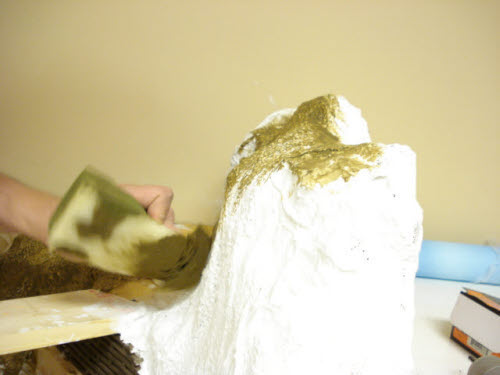
A foam paintbrush can be used to apply the undercoat. Just squirt it directly on the brush and slap it on.
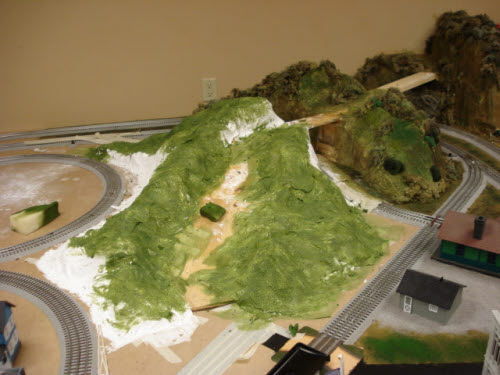
The undercoat not only covers the white surface of the plaster cloth, but it also will hide any areas not covered by trees, shrubs and ground cover. You want the undercoat to be shaded to reflect the general appearance of the scenery in that part of the layout. For instance, more earth undercoat was applied in the hills and natural areas, while the areas around the houses on the left side of the layout have more of a green tint. In the picture above, we see the green undercoat before two coats or earth were applied over it.
Part 4: Ground Cover
We let the undercoat dry for a couple hours before moving to the next step, which is ground cover.

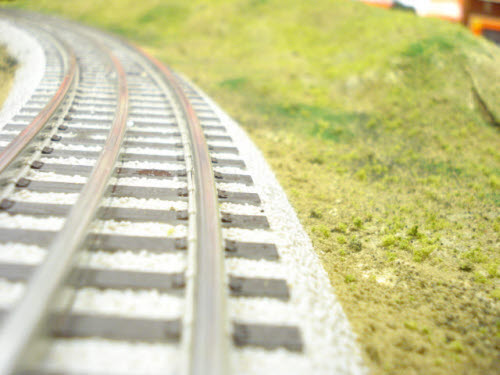
Ground cover is the colored foam and sawdust material that provides a 3-dimensional look to areas not covered by trees and shrubs. Woodland Scenics classifies their groundcover as fine, medium and coarse. We used fine and coarse ground cover our our layout.
Different shades and textures were mixed together and sprinkled on using a Woodland Scenics Scenic Sifter [S194]. The shades used were Fine Soil [T1341], Fine Earth [T1342], Fine Green Grass [T1345], Coarse Medium Green [T1364] and Coarse Dark Green [T1365].
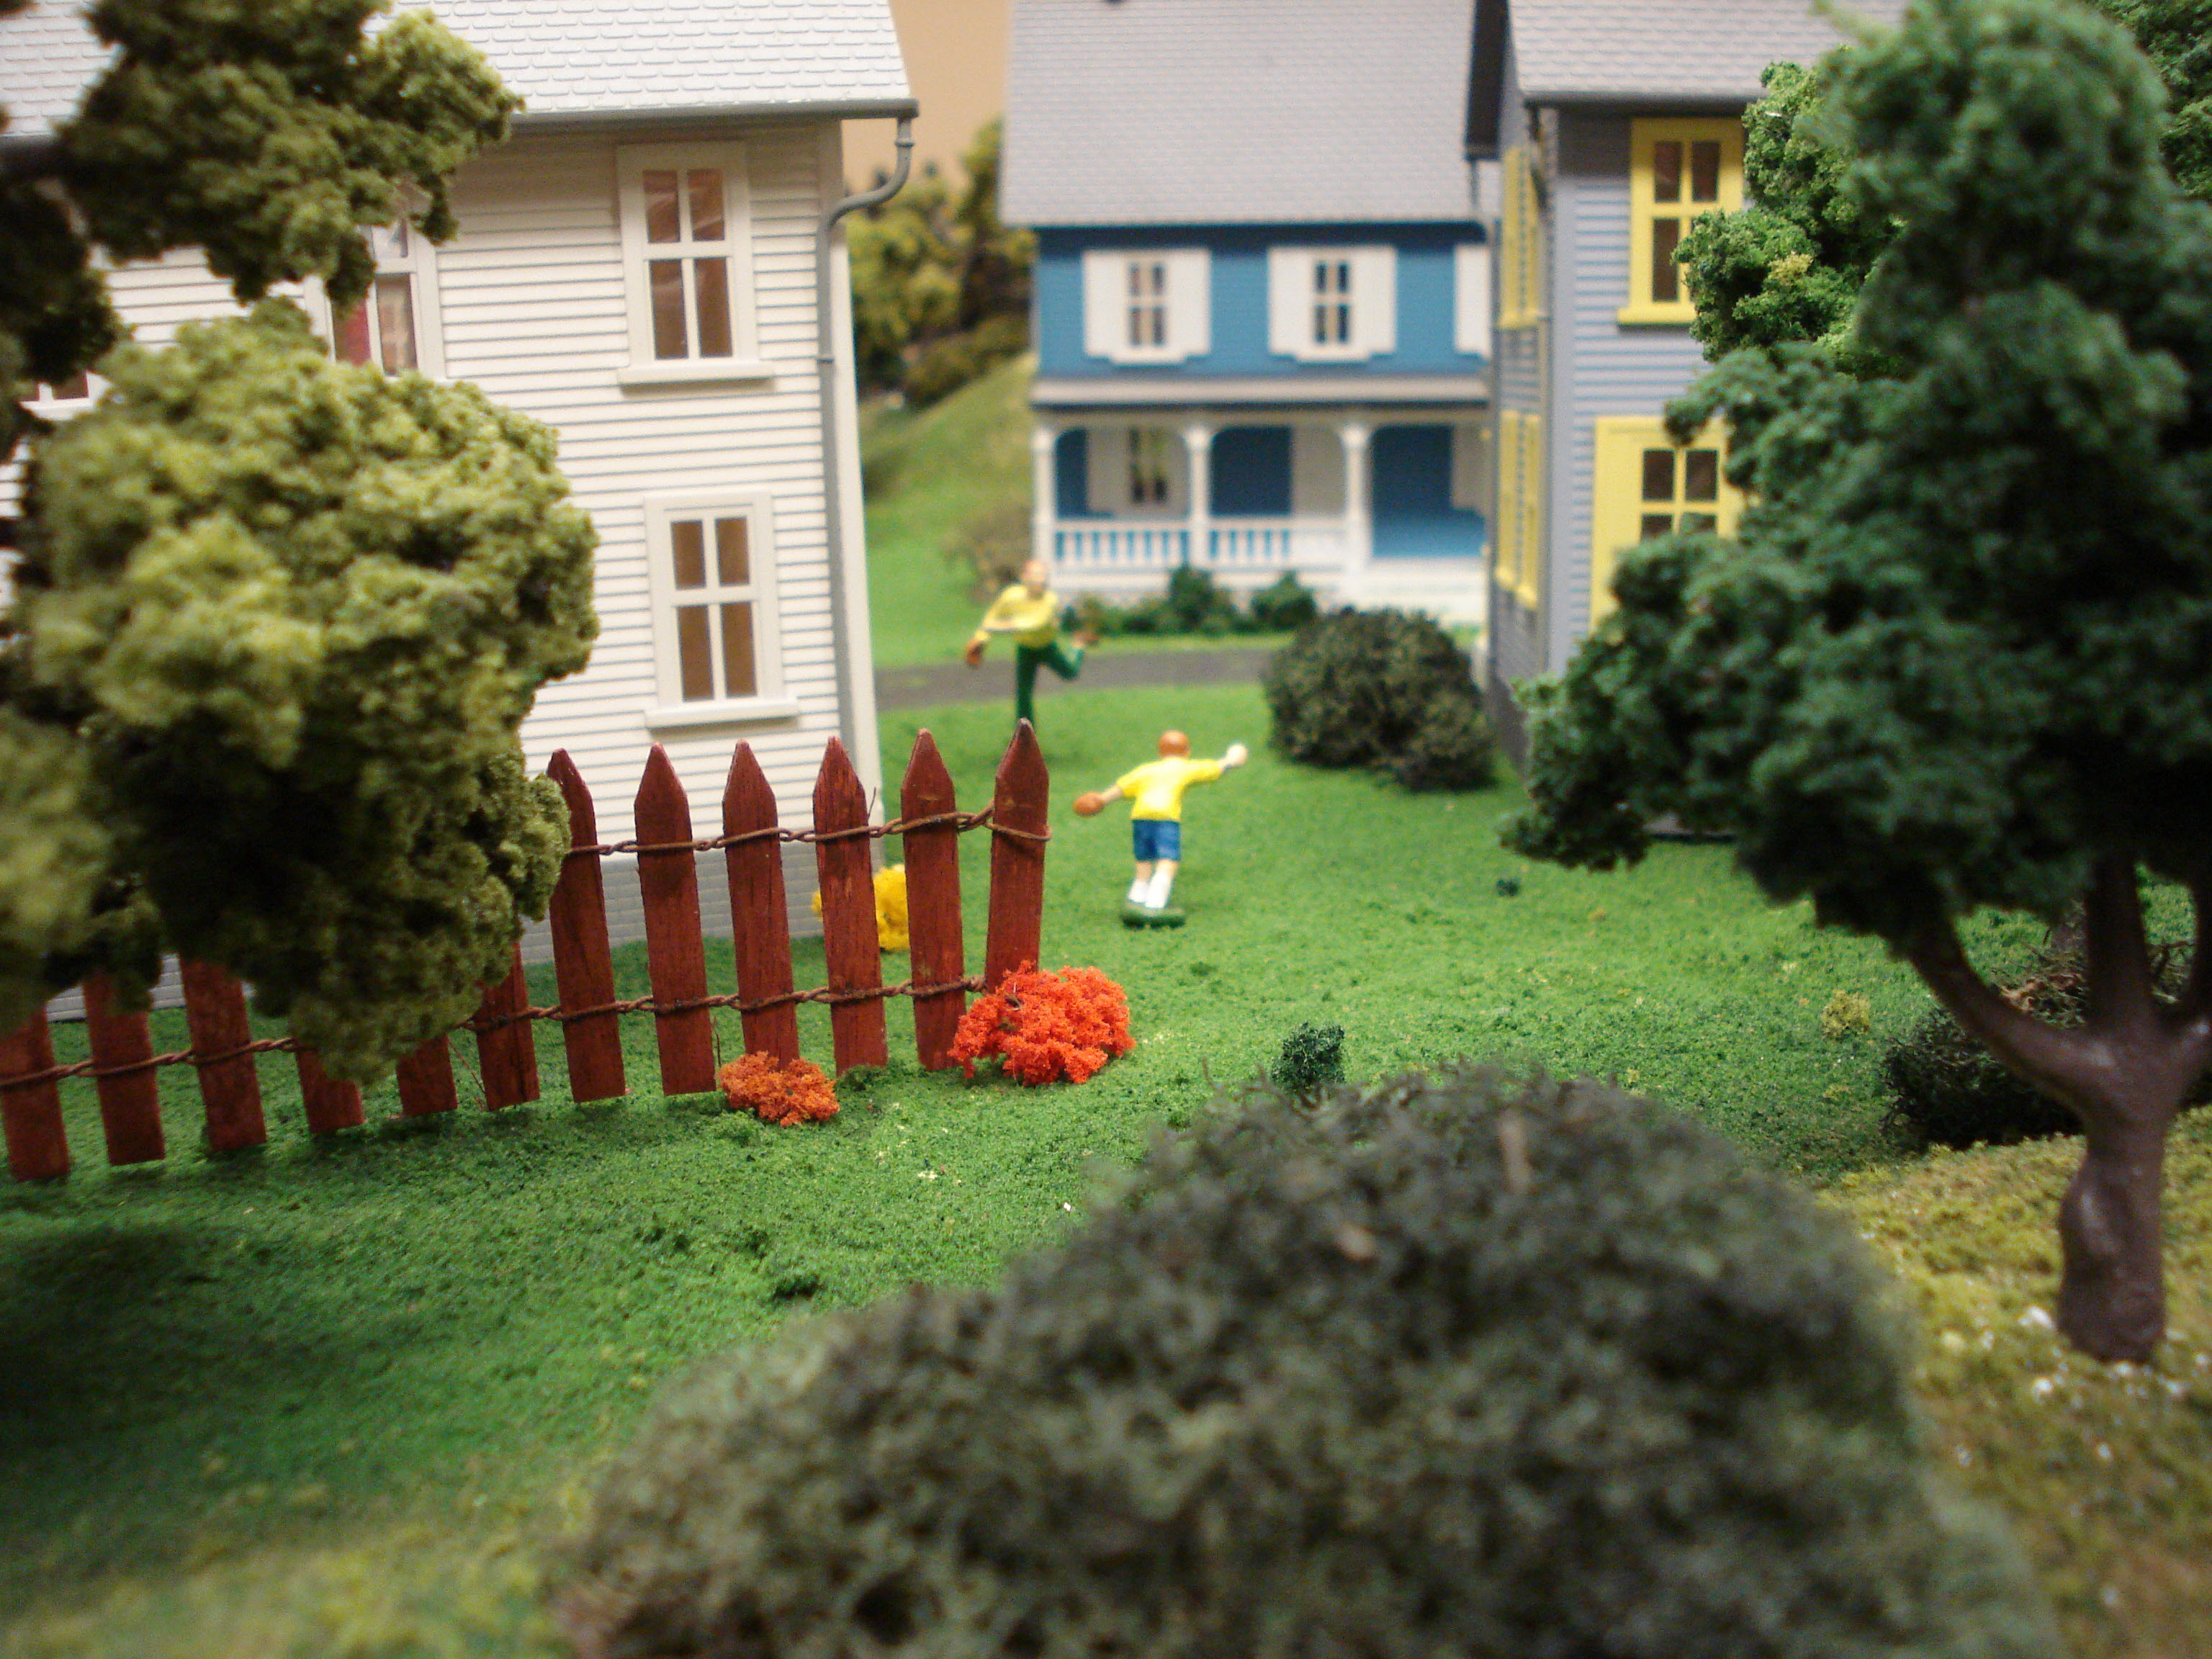
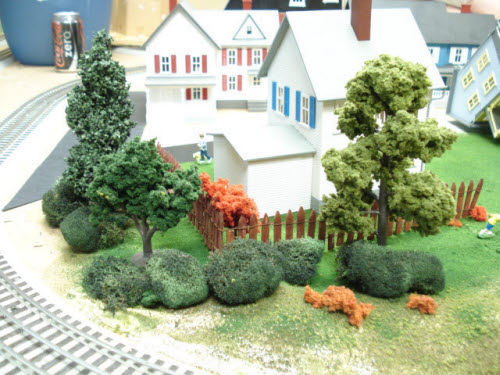
Usually we placed a layer of earth cover, followed by the fine grass and soil, with the coarse blends put on last. The five covers were applied in different levels of intensity, depending on the area on the layout. In natural areas like the ones shown above, the greens were applied more heavily than the soil and earth shades. In the areas around the town, where grass may be scarce due to high activity, the earth and soil colors predominate. In the residential area, a very high amount of grass cover was used. Note the differences in the two pictures below:
Once the ground cover is in place, spray Woodland Scenics Scenic Cement [S191] over the turf to hold it in place. If it dries with a milky-white sheen, you need to dilute the glue with some water.

There is no set rule concerning the amount of cement to use; just use enough to hold the large majority of the turf in place. A little usually will come off when you rub your finger or hand over it.
Step 5: Trees and Shrubs
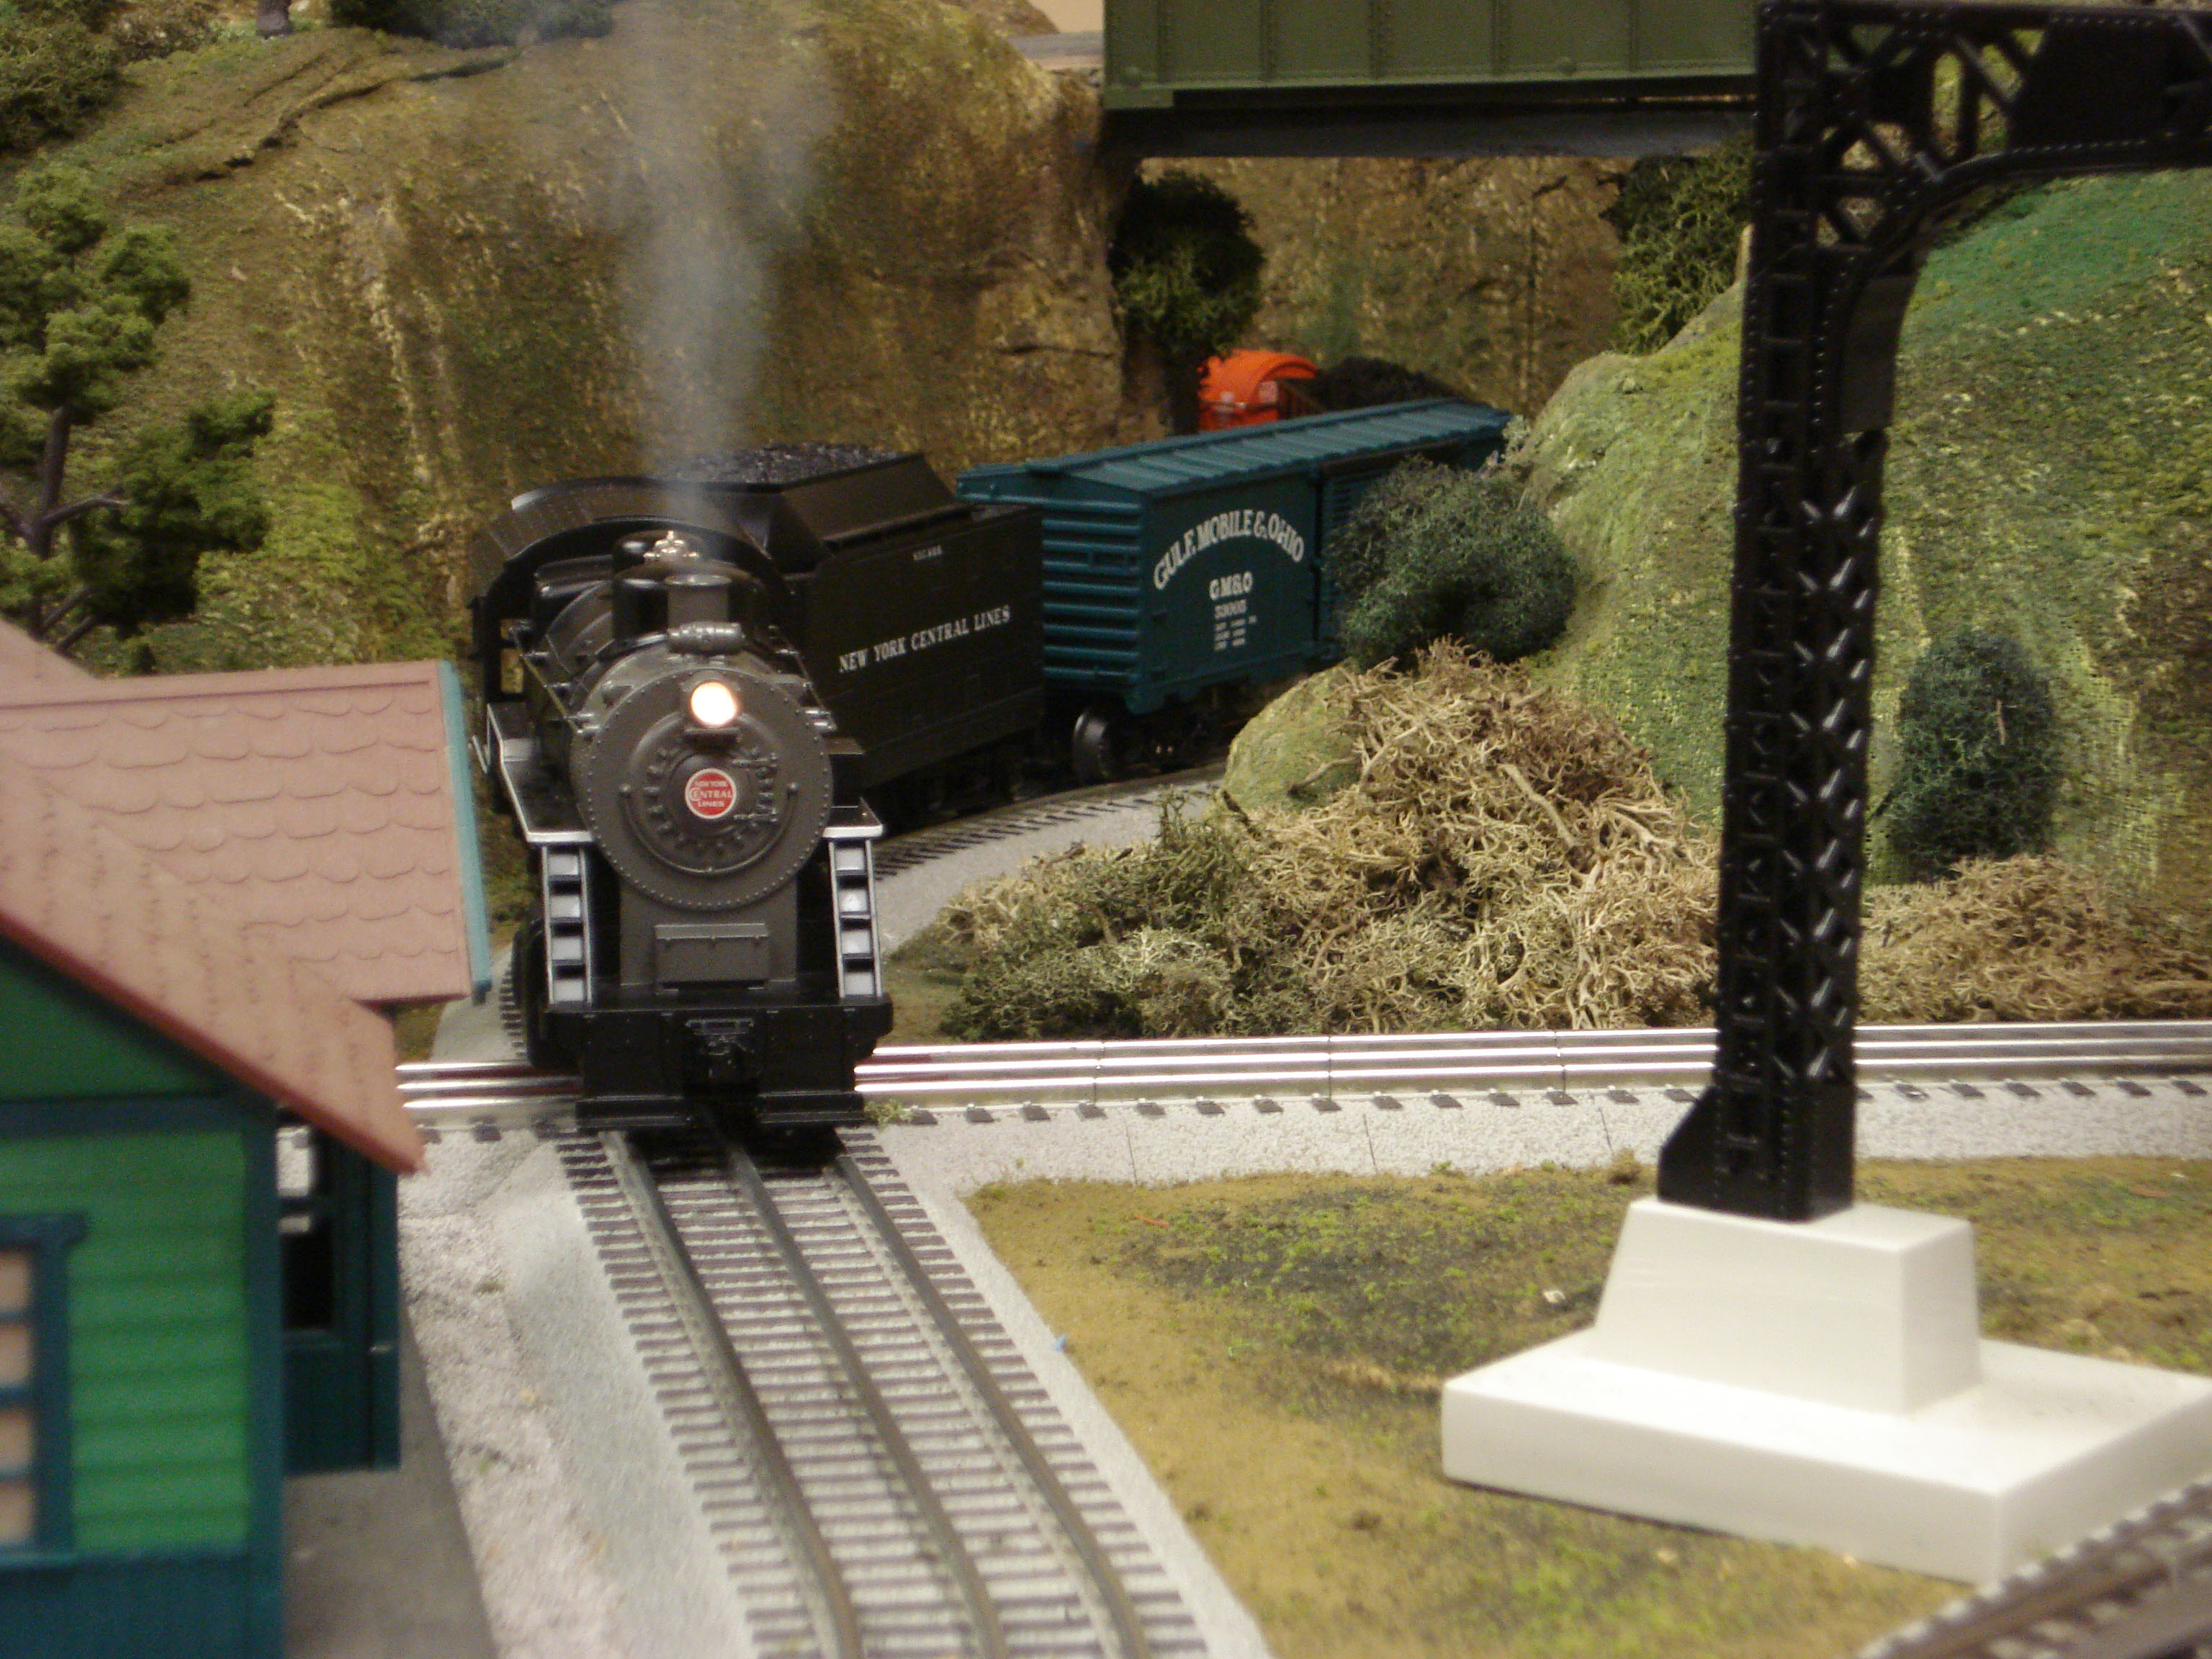
Once the ground cover is in place, it's time to set the trees and shrubs in place.
The best rule for trees and shrubs is to place them in groups instead of spread around evenly. If you try to be too exact, you could get the 'golf course' effect on your layout and the random, chaotic look of nature will be lost.
Our layout's scenery is loosely based on the Appalachian foothills in the Southeastern United States, so we went with relatively large numbers of trees, lots of green, and we mixed in a group of pine trees with the leafy decidous trees that predominate on the layout.
The trees were primarily made from Woodland Scenics Tree Kits such as
kit numbers
TR1102,
TR1103, and
TR1105. A few ready-made
trees from Life Like were also sprinkled in here and there. There
are about 35 trees on the entire layout.
The trees were glued in place, and a small holes were drilled into the scenery to accommodate the pegs on the bottom of the trunks.
The shrubs are a mixture of Woodland Scenics Light Green [L161] and Medium Green [L162] lichen.
The shrubs are glued on using S190 Scenic Glue.
Final Note: The Roads
The roads were directly painted onto the plywood surfaces using flat black interior paint. Some modelers like to use sheets of styrene for streets, but for our purposes the paint worked fine.
Other Sources of Information
Overall our scenery gives a decent effect, but there is much, much more that can be done with model railroad scenery than what you see here. There are many books on the subject, and here are a few we find to be very helpful:
How to Build Realistic Model Railroad Scenery, by Dave Frary. Tons of information from one of the hobby's greatest layout buiders.
O Gauge Primer, by Christopher Ritchie and the OGR Staff. Great overview of the O Gauge hobby with some scenery methods mixed in.
Basic Scenery for Model Railroads, by Lou Sassi. Great instroductory guide to the subject, full of easy projects that add lots of character to a layout.
Scenery for your Model Railroad, by Mide Danneman. Very thorough and full of pictures. Lots of information about making realistic backdrops.
Building City Scenery for your Model Railroad, by John Pryke. Loads of information about one of the most challenging aspects of scenery building.
Thanks for reading!
Tommy Feldman
General Manager, Trainz.com